Creating Key
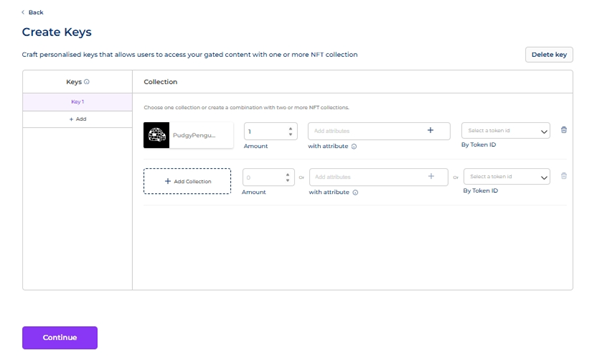
The next step is to create the key to the gate. These keys allow users to access your gated content with one or more NFT collections.
Here's how to create and manage these keys:

- Add a Collection:
- Navigate to the Token Gating section and select the gate for which you want to create a key.
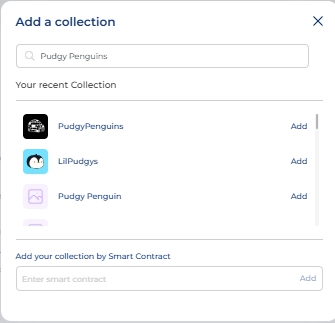
- Choose to Add Collection.
- You can search for the collection by name or smart contract address. It is highly recommended to use the smart contract address to ensure accuracy.
- Set Gating Criteria:
You can gate access based on:- Amount of Tokens Held: Specify the number of tokens a user must hold.
- Attributes: Set criteria based on specific attributes of the NFTs.
- Token ID: Restrict access to specific token IDs.
Create as many criteria as you need to ensure exclusivity of access.
- Create and Manage Keys:
- You can create multiple keys for different criteria or collections.
- Use key-renaming to easily navigate between different keys.
- To delete a key, select the delete option. Note that once a key is deleted, it cannot be retrieved.

In this example, we are gating access using the Pudgy Penguins collection: This means that the user will need to have at least 1 Pudgy Penguin NFT to access the gated content.
- Select Collection:
Click Add Collection and enter the smart contract address for Pudgy Penguins. - Set Criteria:
Choose Amount of Tokens Held and set it to 1. - Save Key:
Name the key for easy identification, such as "Pudgy Penguins Gate".
Save the key and ensure it is active. - Test and Verify:
Ensure the gating works by testing with a wallet that meets the criteria.
Updated about 2 months ago